Kyle's pictures
photos © Kyle Hernandez
![[PICTURE-spikes]](spikes.gif)
spikes (51k gif)
sound garden,
negative (51k gif)

sound garden,
positive (50k gif)
My pictures
photos © Wendy Mukluk

faux historical shot (36k gif)
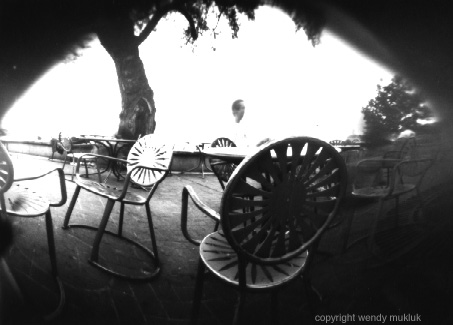
at the terrace
(66k jpeg)
out the window
(70k gif)
Kyle's picturesphotos © Kyle Hernandez
|
|
|
spikes (51k gif)
|
|
|
sound garden, negative (51k gif)
|
sound garden, positive (50k gif)
|
My picturesphotos © Wendy Mukluk
| |
|
faux historical shot (36k gif)
|
at the terrace (66k jpeg) |
|
out the window (70k gif)
|
|
If the top and bottom are thin cardboard or translucent plastic, they need to be covered with black plastic or cardboard, as well as painted. Cut a circle of plastic or cardboard an inch or two larger than the lid, then cover the lid and fold down sides of the circle so they extend down and overlap the sides of the box more than the lid did before. Fasten circle to lid with glue or tape.
Cut a hole about 4 inches square in the side of the box about halfway between top and bottom. A rectangular hole will do, because you are going to cover it with tinfoil or black plastic.
Take a piece of tinfoil about 6 inches square (enough to cover the cut out hole and have some overlap to prevent light leaking in) and poke a tiny hole in the center of it. Hold it up to light to make sure hole goes all the way through. This is your "lens". Put the tinfoil over the hole on the box and tape around the edges.
Cut a piece of bendable cardboard or heavy black plastic about 4 inches square and place over pinhole. This is the shutter and will be removed for exposure and replaced during transport and storage. Tape it to the box at the top so it can be flapped up or down, or devise something more sophisticated, such as moving the shutter up and down on cardboard runners.
In darkroom under safelight, place a piece of photographic paper in the box, making sure the emulsion (shiny, or stickier) side is facing the pinhole. Use 5"x7" paper in a 4" diameter, 6" tall box. Make sure the lid is on tight and the shutter is closed before turning on lights. You might want to secure the lid with a piece of masking tape, just in case.
Take a picture by setting the camera in a fairly stable position (a rock or beanbag on top might help). Point the pinhole in direction of subject. Lift shutter and leave open to expose paper. Exposure varies from about 30 seconds in bright sunlight to 10 minutes to an hour in heavy overcast, for most resin coated variable contrast papers. Other types of film and paper can vary widely, so try some test shots first. When exposure time is up, replace shutter and take the camera to the darkroom.
Develop film or paper according to paper manufacturer's instructions. The result, when using photographic paper, is a paper negative, which can then be contact printed to make a positive. Paper negatives can be blown up in a photocopier onto transparencies (clear plastic), or even scanned and the resulting computer file printed onto clear plastic, to make larger contact negatives.
For many exposures, or for excursions far from the darkroom, make several pinhole cameras and carry them in a black trash bag or large cardboard box.
Black and white and color films and papers may be used. You can also use blueprint or gum bichromate or other types of light sensitive papers, and for some of them you would not need a darkroom at all. See the instructions for blueprints, gum bichromates, van dyke brownprints at this site, for example.
A slower ISO/ASA speed is easier to work with, so this is a good use for outdated materials.
Color or neutral density filters, wavy glass, screens, etc, can be attached over the pinhole with tape to slow fast films and for special effects. Most of these will cut down on the light so you will need to try longer exposures.
Make multiple pinholes on one piece of tinfoil, on one camera, for overlapping images or for several images on one piece of film.
Try having the subject stand still for part of the exposure, then quickly move to another spot for another part of the exposure, to end up with several shadowy images of the same person or thing in one picture, all in one exposure. Or, have the subject move slowly for a blur effect.
Try photographing moving subjects during long exposures, or with
off-camera flash.
2. If your film or paper comes out blank (clear or white), the exposure probably wasn't long enough. Try longer exposures. It might turn out you need twice as long or ten times as long, or more. Also, check to make sure light can go through the pinhole and that nothing is blocking the pinhole when you make exposures. Make sure you put the paper or film in the pinhole camera with the emulsion facing the pinhole. If you put paper in backwards, with the emulsion facing the back of the box instead of facing the pinhole, it would need a much longer exposure.
Note: If you are using directfilm or paper (such as copy film or color slide film), then all clear means it was completely exposed; see 1, above.
Some of the many possibilities:
"Art in America", March 1994, p. 84, photography by Steven Pippin, and google him for his (amazing, in my opinion) more recent pinhole work.
Detailed instructions on pinhole cameras, and references:
Robert Hirsch, Exploring Color Photography, Wm C Brown Publishers,
Dubuque Iowa, 1989 p. 222.
return to alternative photography page page
![[PICTURE-centipede]](lred.gif) the Wendy Mukluk home page
the Wendy Mukluk home page